My poor blog has been so neglected. I have so many parties that I want to share with you guys, including photos and details from my children’s birthday parties last year. First things first though… today, I am sharing with you photos that will hopefully give you some ideas for a hotel welcome bag. What’s a hotel welcome bag? When you are hosting an event and have guests from out of town, it’s nice to have the hotel leave a welcome bag or basket in the guest’s room. These can be elaborate or a simple note with a bottle of water and snacks. It is a way for you to acknowledge that they’ve travelled aways to be at your event and you appreciate this.
A couple years ago, we hosted an event in Warner Robins, Georgia and had guests traveling from Florida, Illinois, New Hampshire, North Carolina, and Mississippi to be with us for the weekend. We hosted a dinner in the evening and enjoyed the second night in the hotel’s beautiful gardens with an impromptu Champagne and appetizers gathering.
When we first arrived, I gave the hotel receptionist bags to place in each guest rooms, including a couple extra bags for the children, a thirteen year old boy and his five year old sister.
Generic welcome bags…
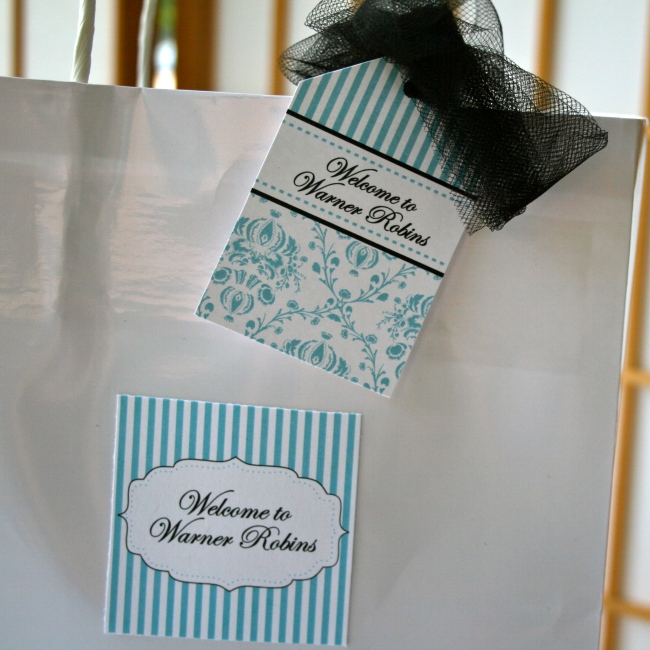
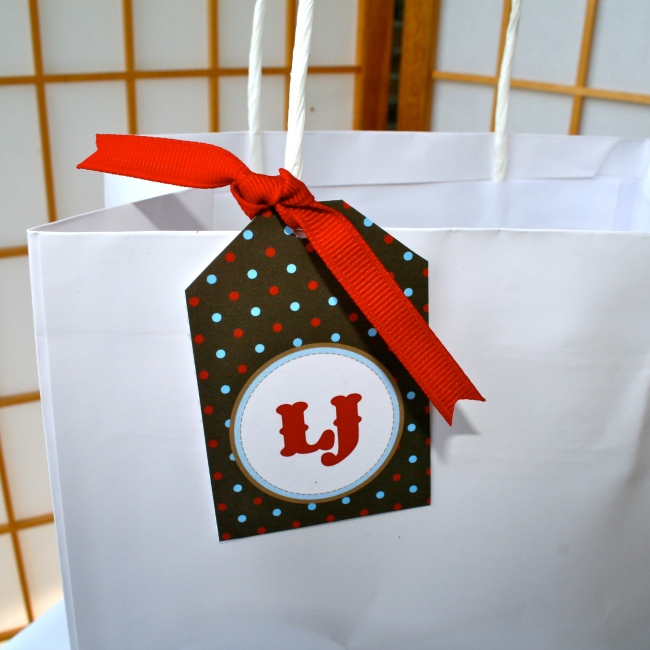
I used plain white bags that I found at my local Target in their party department. I added a 3 inch square sticker to the front and a coordinating hang tags which I attached to the bag with some black tulle. I decided to with a classy teal blue, white and black color scheme and because I felt it was elegant and not too feminine. If you’ve followed my work for any length of time, you’ll know that I love mixing patterns so I used some damask and stripes.
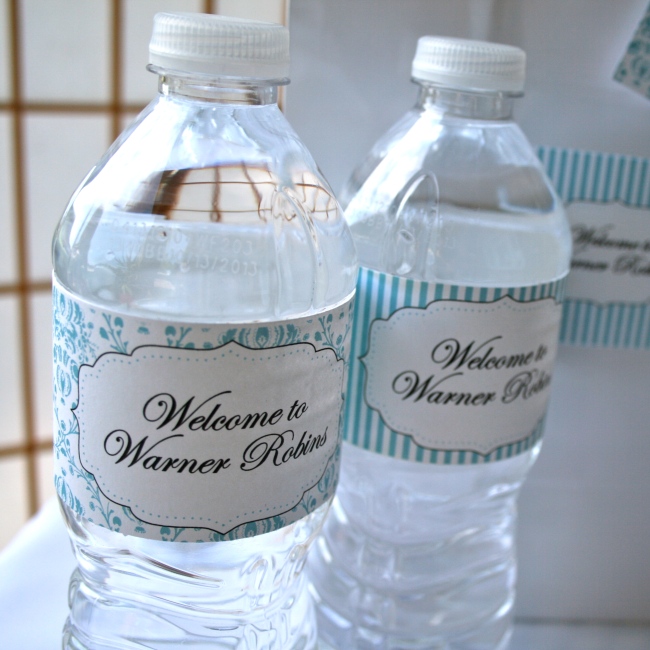
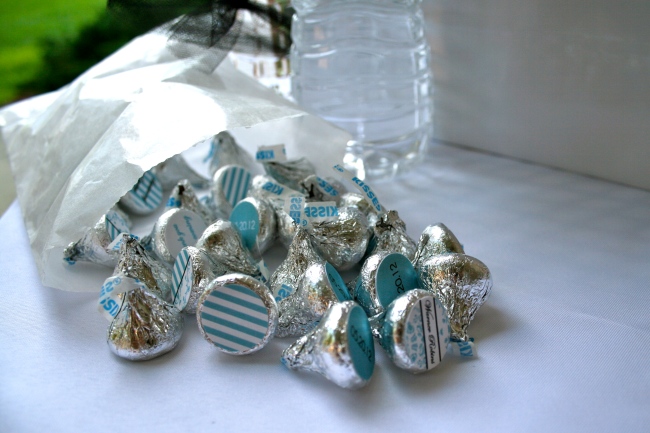
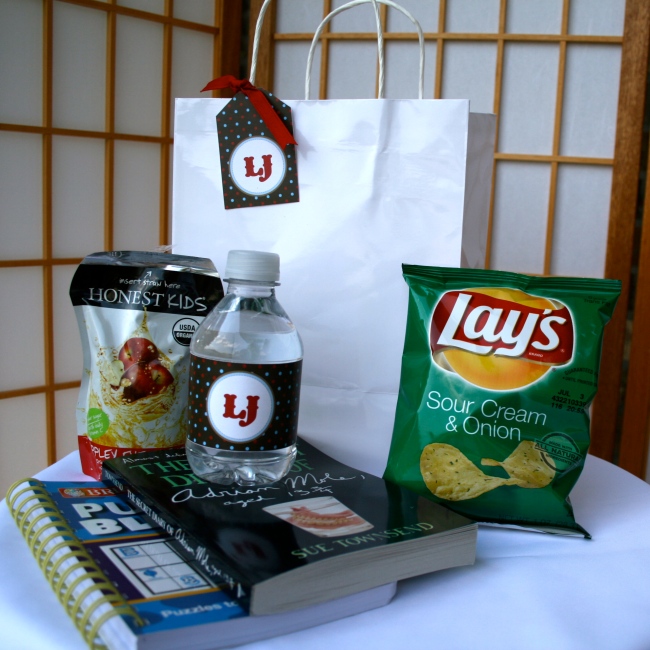
These bags contained a couple bottles of water and a glassine bag filled with Hershey kisses. I put personalized labels on the water bottles that read “Welcome to Warner Robins” and personalized stickers on the chocolates, too. All these labels are available via my Etsy store. Inside, I placed some snacks… a couple bags of potato chips and a box of imported cookies.
Depending on your event and the location, you can tailor your bags more. For example, if your event is in Las Vegas for a bachelorette party, how about including small bottles of wine, Gatorade and granola bars (energy for the morning after a hard night of partying), a pack of playing cards and some poker chips? Maybe even an information sheet with rules for various card games.
On the other hand, if your event is a destination wedding on a tropical island, you could include sunscreen, lip balm with SPF, bug spray, postcards, bottle of local beer, dried fruit and cookies from a local bakery and maybe a beach towel embroidered with the guest’s name or monogram.
Whatever you choose to put inside, don’t forget a note. I decided to print out an itinerary to make sure everyone know what was happening, when and where. Include full addresses if people have access to a car. I also made sure cell phone numbers were on the welcome note so that any guest could get hold of me if they had questions.


For the teenage boy…
I included a bag of potato chips, an organic juice box, a bottle of water (with personalized label, of course), a puzzle book and a trade paperback novel. What book do you get a teenage boy who loves to read and has probably read all the latest best sellers? Well, I ordered a copy of Sue Townsend’s The Secret Diary of Adrian Mole, aged 13 3/4 from my favourite book store, Barnes and Noble. This was a book that was highly popular when I was a kid and I remember it being laugh out loud funny so I was pretty sure this teenager would have never read it. If you are stuck with what book to get, you can always ask the parents for a few suggestions.

For the five year old girl…
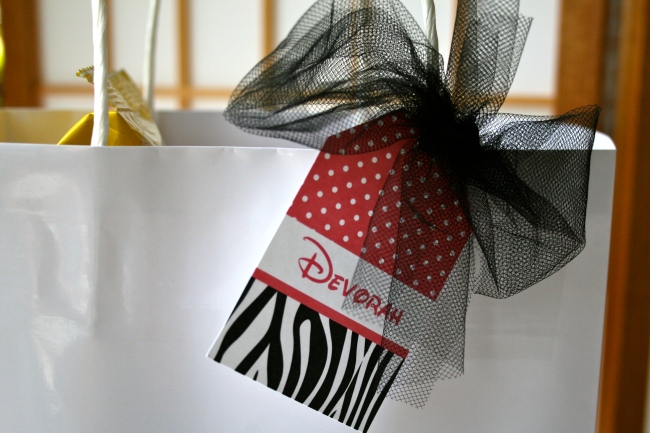
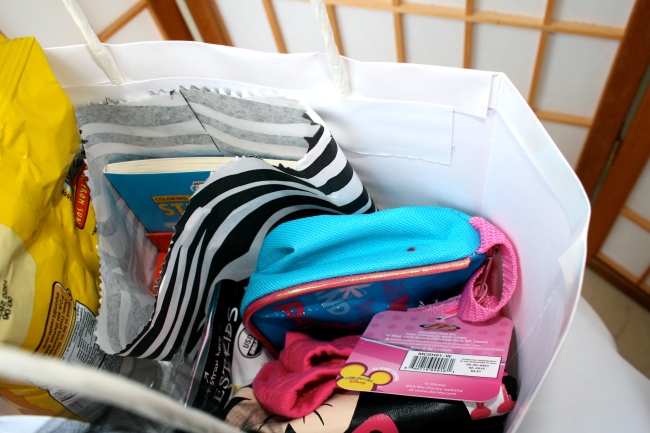
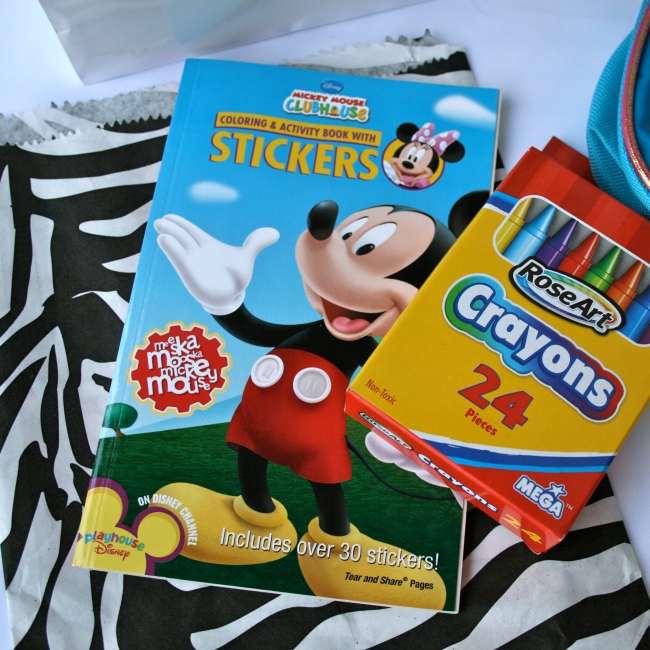
I decided to go with a fun Disney theme and added a touch of sass by utilizing a fun zebra print and hot pink. Of course, her welcome bag had a hang tag with her name on it and inside I include a Mickey Mouse Clubhouse coloring and activity book with stickers, a pack of crayons, a cute little Minnie Mouse handbag, a Minnie Mouse t-shirt (both of which were inexpensive finds at my local Walmart store) and of course, the necessary snacks- a bag of potato chips, organic juice box, and a bottle of Junior size water with personalized label.
Again, you can let your destination dictate what you place inside your welcome bag. If you are doing a beach wedding, then something along the lines of sand toys, oversized sunglasses and baseball cap would go over really well. Or if the hotel has a beautiful pool, then perhaps some pool toys such as dive sticks or a blow up beach ball?

Hope this gives you some ideas. Don’t be afraid to be creative and if you are on a tight budget, remember that even a simple note would be appreciated by your out of town guests. As always, you can follow me on Twitter, like my Facebook page or check out my super awesome Etsy store.